


Import Or Export MS Excel Files Or Transaction Lists On QuickBooks
QuickBooks Desktop is an accounting software developed and marketed by Intuit mainly for small and medium-sized businesses. It offers Offline (on-premises) and online (cloud-based) accounting applications versions that accept business payments, manage and pay bills, and payroll functions.
It has many web-based features like remote access capabilities, remote payroll assistance, and outsourcing, E-payment functions, online banking, and bank reconciliation. It has mapping option through Google Maps, marketing options through Google, and improved e-mail functionality through Microsoft Outlook and Outlook Express.
QuickBooks is only operable in a window device, but The Mac (OSX) version is available only in the United States.
QuickBooks has POS(Point of Sale) software for retailers that replaces a retailer's cash register, maintain its inventory records, sales record, customer information, and provides accounting reports for managing the business and serving its customers.
Import MS Excel Sheet in QuickBooks Desktop
You can Import MS Excel Sheets in QuickBooks Desktop using various options available while importing in QuickBooks Desktop. You can import Customer and Vendor details, Invoices, Items list and List of all Ledger Accounts prepare in ms excel sheet. There are 3 different options available for importing the ms excel sheet.
Read Also:-Standby Generator: its types and Benefits
- Advertisement
Standard Import
QuickBooks Desktop opens a formatted Excel Sheet where you can enter your updated information. When you save and close the file, you’ll be able to review the results and look at your updated data in QuickBooks Desktop. To import Customers list, Vendors list, and Products details
- Go to File menu > Select Utilities > Go to Import > Excel Sheets.
- Click No, If you get the Add/Edit Multiple List Entries window.
- Follow the steps in importing files.
- Select the type of data you want to feed.
QuickBooks opens a formatted excel sheet. Once you have entered your information, save the file and close it, you will be given an option to choose ‘Add My Data Now’.
- Review the results and verify the data in QuickBooks.
- After verifying Click on Close.
Note: If you want to import the additional customer details, vendor details or any item data from the excel sheet using this option, you can go back to this window.
To import the list of Chart of Accounts
Note: Before importing, we recommend that you create a backup of your company data to prevent data loss.
- Go to the Lists menu, then click on Chart of Accounts.
- Click the Account and scroll down at the bottom, then choose Import from Excel.
- Click on Browse to select the Excel sheet you want to import.
- Select the file and click Open.
- Select the Excel Sheet from where you want to import the data.
- Map your accounts for the next step.
Mapping your chart of accounts tells the QuickBooks how to import the data from your Excel sheet. The column headings in QuickBooks may be different from your Excel sheets, so you’d need to match them by following the given below steps-
- Write a mapping name.
- Chose Account as an Import type.
- Now, Match the information under QuickBooks with the column headings in the Excel sheet.
- Now on Click Save option.
- Click on Import. If it's your first time to import, click Yes to continue.
- Advanced import
Follow the steps if you are importing inventory items and you do not have any Excel file or CSV file yet.
Important points to remember Existing inventory items: You can not do changes in the Quantity On Hand, value on hand, or average cost.
New inventory items: You can set up a new Quantity On Hand and a Value on Hand and establish a new average cost. QuickBooks enters an Adjust Quantity/Value on Hand debiting the item's asset account and crediting the Opening Balance Equity.
If you want to import item quantities or values and you have Advanced Inventory and Multiple Inventory Sites enabled, you must disable Multiple Inventory Sites before importing.
Before importing any data, Create a Backup of the QuickBooks company data file without overwriting any previous backups.
You cannot import Subtotal, Payment, and Sales tax items via the Advanced Import function, but you can import them with an IIF file. For more details, refer to Export or import IIF files.
Step 1:
- Turn on inventory preferences
- Log in to your company data file as an Admin.
- Make sure you are using the Single-user mode. Note: On the File menu, It will show the option to Switch to Multi-user Mode. If not, Switch to Single-user Mode from the QuickBooks Edit menu, select Preferences also.
- Select Items & Inventory from the left pane, then go to the Company Preferences tab.
- Drop a checkmark in the Inventory and Purchase Orders are Active box, then select OK.
Step 2: Set up accounts in your data file
- From the Lists menu, click on Chart of Accounts.
- Right-click in the Chart of Accounts then select New.
- Select the Account Type. You need to create the following account types:
- Income/Revenue Account (to track sales).
- Cost Of Goods Sold (COGS) account.
- Inventory Asset Account.
Step 3: Create your own data for each of the following item
- Enter Item Name: Which you want on your item list.
- If you are importing Sub-Items, the Parent item must either already exist in the Item List or being on top of the Sub-item, in list order, on the excel sheet you are importing.
- If you are importing Sub-Items, the Item Name would be formatted with the Parent separated from the Sub-Item by a colon.
- Example:Widgets:Widget01:Widget02:Widget03
- Item Type: Include the type of item, i.e. inventory part, service, etc. Item name must be spelled out just as you see it in QuickBooks.
- Description of the Item: Written description of the Item that will appear in the Item List, Sales Orders, Sales Receipts, and Invoices.
- Income Account: Name of the Income Account in which sales of the item will be recorded.
- Inventory Asset Account: Name of the Asset Account in which the inventory value will be recorded.
- Name of the COGS Account: Name of the COGS Account in which purchases of the item will be recorded.
- On Hand Quantity: The Quantity On Hand of the Item (Inventory Items only).
- Cost of Item: The Cost of the Item.
- Sales Price: Sales Price of the Item.
- Total Value: The Total Value of the Item (New Inventory Items only).
- As Of Date: When the Item was last purchased (New Inventory Items only).
- Is Passed Thru: Be sure that you put a Y in this column so you can track both the cost and price of the item.
- IMPORTANT: You must use the same name, spelling, and capitalization as it appears in the Chart of Accounts.
Optional Information:
- Manufacturers Part Number or SKU: You can also import the part/SKU number of an item.
- Reorder Point: Once the Item On Hand count reaches this amount, QuickBooks will prompt you to reorder more Items.
Step 4: Create the spreadsheet
- Create the spreadsheet using these tables as guides:
- User-added image
- User-added image
- User-added image
Step 5: Prepare to import
- Make sure you know the location of the Excel spreadsheet file. QuickBooks will sync with the spreadsheet during the process.
- Start QuickBooks.
- Open your company data file.
- Back up the QuickBooks company file without overwriting any previous backup.
Step 6: Import the spreadsheet
- Go to File menu > Utilities > Import > Excel Files.
- On the Add/Edit Multiple List Entries, click No.
- Click Advanced Import.
- Setup a mapping.
- Click Browse and choose the Excel file.
- Choose the correct sheet in the Excel workbook.
- Check This data file has header rows box to identify the available headers from your file.
- On Choose a mapping dropdown, select Add New.
- On the Mappings window:
- On the mapping name field, type a name to easily identify the mapping (Customer, Vendors, etc…).
- From the Import type dropdown, choose the data you are importing.
- Match the QuickBooks and Import Data columns, then select Save. Note: QuickBooks column displays the available customer fields in QuickBooks and Import Data column displays the available row headers on your Excel file. If you don’t have data from your file that will match the fields in QuickBooks, leave it blank.
- Click Preview to verify the mapping.
- Click Import to complete the import.
- If you receive the Duplicate Record Found error, you will be presented with these options:
- Keep existing data and discard import data.
- Replace existing data with import data, ignoring blank fields.
- Replace existing data with import data, including blank fields.
- To fix the errors
Read Also:-How To Fix Blurry Videos On Android
Choose the appropriate option.
- Click Apply or Apply to all.
- You will receive a notification indicating the number of successful imports and the number of errors. If you have errors, select Save for the error log and review it to determine necessary action to resolve the errors.
- Re-import list as needed.
- For customers, vendors and other lists data
- Use this option if you are importing Customers, Vendors, Items and other lists data and you have an Excel file or CSV data already formatted for QuickBooks.
- From the File menu, click Utilities > Import > Excel Files.
- On the Add/Edit Multiple List Entries, click No.
- Click Advanced Import.
- Set up a mapping.
- Click Browse and choose the Excel file.
- Choose the correct sheet in the Excel workbook.
- Check This data file has header rows box to identify the available headers from your file.
- On the Choose a mapping dropdown, select Add New.
- On the Mappings window:
- On the mapping name field, type a name to easily identify the mapping (Customer, Vendors, etc…)
- From the Import type dropdown, choose the data you are importing.
Match the QuickBooks and Import Data columns, then select Save. Note: QuickBooks column displays the available customer fields in QuickBooks and Import Data column displays the available row headers on your Excel file. If you don’t have data from your file that will match the fields in QuickBooks, leave it blank.
- Click Preview to verify the mapping.
- Click Import to complete the import.
- If you receive the Duplicate Record Found error, you will be presented with these options:
- Keep existing data and discard import data.
- Replace existing data with import data, ignoring blank fields.
- Replace existing data with import data, including blank fields.
- To fix the errors:
- Choose the appropriate option.
- Click Apply or Apply to all.
You will receive a notification indicating the number of successful imports and the number of errors. If you have errors, select Save for the error log and review it to determine necessary action to resolve the errors.
Re-import list as needed.
- Add/Edit Multiple Lists
This option allows you to add and edit multiple customers, vendors, and items. This is for list information (name, description, etc.) and cannot be used to import transactions (invoices, bills, etc…).
- From the Lists menu, select Add/Edit Multiple List Entries.
- Click the List dropdown and choose the list you want to work with.
- Filter the list to see a particular record.
(Optional) Click the Customize Columns button to choose which columns you want to see in the Add/Edit Multiple List Entries window. This way, you can easily work on the columns you need. Click the Default button to return to the preset columns for the list.
- To add: from the left pane, select a column and click Add.
- To remove: from the right pane, select a column and click Remove.
- To rearrange the column order: from the right pane, select the column and click Move Up or Move Down.
- Click Ok.NOTE: Columns like customer or vendor name are required and cannot be removed. You can only change their order.
Add or edit the entries by clicking the appropriate fields. Note that you can copy (Ctrl+C) data from Excel and paste (Ctrl+V) it into this window. You can also Copy down and Duplicate rows (highlight any field and click Copy Down and Duplicate Row)
- Click Save Changes.
- After saving your changes, you will receive a warning message telling you the number of records saved. QuickBooks will also tell you if there are errors that need to be fixed.
- To fix the errors:
- Click or hover your mouse in any field to see what the error is.
- Update the record to fix the errors.
Click Save Changes and repeat the process until all errors are fixed. Note that If you don’t want to fix an error, you can save the changes you’ve made so far and click Close without making further changes. QuickBooks will not save the changes that contain errors.
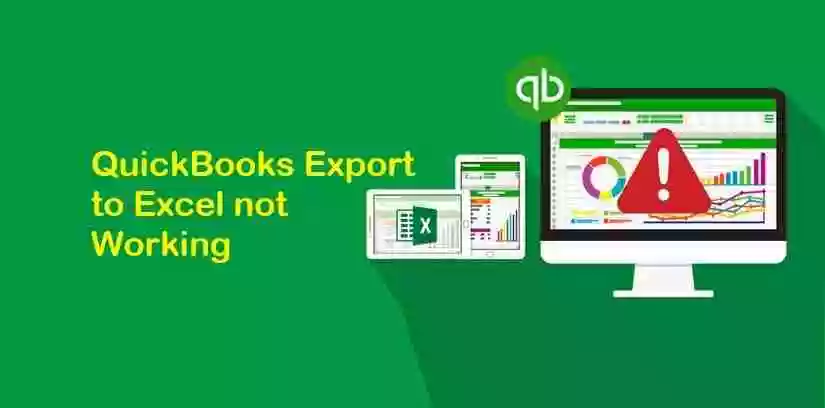
Export MS Excel Sheet in QuickBooks Desktop
You want to make changes into the accounting report’s appearance or its contents in several ways that are not accessible in QuickBooks for that you need to export the data in excel sheets and customize it in excel without changing your QuickBooks data.
You can export Customers, Vendors, Items lists, Payroll lists, and transaction details into excel sheets and do changes according to your current available data and information.
Read Also:-Benefits of Enrolling in Popular Photography Colleges